

How to Build an Eagle Medal Lightbox
Here is a detailed plan on making your very own Eagle Medal Lightbox. The BSA used to sell these in the catalog, but it seems that now you can only find them in scattered Scout Troops here and there. Some councils have one or two that they loan or rent.This final product is HEAVY, so make sure you get 4 good strong folks to carry it. It's not too expensive to build, and will last for years. You need to make sure you have a place to store it because it's big (12"x25"x54")
The good news is that this device will add some serious 'punch' to your Eagle Scout Presentation. We have seen some good use already from ours. If your troop has many Eagle Ceremonies then it just makes more sense to build one than to try to find one to borrow.
Expect this project to take you at least the better part of a day. So gather the materials listed below and plan to get an early start.
Equipment Needed
| Equipment Needed |
|---|
| Computer |
| Inkjet Printer |
| Inkjet Transparency Sheet |
| Corded Hand Drill |
| 1/8" drill bit |
| inset drill bit |
| Corded Circular Saw |
| Router |
| Belt sander |
| Overhead Projector |
| paintbrush |
| Sharpie Magic Marker |
| newspaper |
| available blank wall |
| butcher paper |
| staplegun |
Materials Needed
| Material Needed | Qty | Approx Cost |
|---|---|---|
| 3/4" Plywood | 1 sheet | $25.00 |
| 3/4" Particle Board | 1 sheet | $15.00 |
| 1.5" drywall screws | 100 | $5.00 |
| Gorilla Glue | 4 oz | $4.00 |
| 1/4" plexiglas | 2'x4' | $40.00 |
| White primer | 1 gal | $11.00 |
| White Semi-gloss paint | 3 cans | $12.00 |
| Black Flat paint | 4 cans | $16.00 |
| Black Craft paint | 8 oz | $10.00 |
| Red Craft paint | 4 oz | $5.00 |
| White Craft paint | 4 oz | $5.00 |
| Blue Craft paint | 4 oz | $5.00 |
| Grey Craft paint | 4 oz | $5.00 |
| 14 guage wire | 100' | $30.00 |
| Wire nuts (large) | 1 box | $3.00 |
| Wiring Staples | 1 box(50) | $6.00 |
| Electrical Cord with plug | 1-15' | $5.00 |
| light switch | 5 | $1.50 |
| switchbox | 1 | $1.50 |
| switchbox (3 switch) | 1 | $1.50 |
| switchbox (2 switch) | 1 | $1.50 |
| switch faceplate (3) | 1 | $1.00 |
| switch faceplate (2) | 1 | $1.00 |
| lightbulb socket(white plastic) | 9 | $12.00 |
| loop handles | 4 | $1.50 |
| 2" wide felt (blk) | 1 roll | $1.50 |
| Total | $225-250 (+ Tax) |
Directions
Initial Assumptions:
I'm assuming you've already gone and grabbed the materials and equipment listed above.
I am assuming you had the plexiglas cut to the right size (4'x2') at the store.
Step 1: Get a Transparency of The Eagle Medal
Find a graphic of the Eagle Medal. It should be a good line drawing of it. OR, you can simply Click Here for the one I used.
I am assuming you know how to right-click on a graphic and 'SaveAs' into MyDocuments or some such easily findable location on your computer.
Open up a Word Processing program, Like MS Word or WordPerfect, and insert the graphic of the medal onto the page, with nothing else on the page.
Load a sheet of inkjet transparency paper (available at your local office supply store) into your inkjet printer. BE CAREFUL!! to make sure it's loaded right. These sheets come with a smooth side and a rough side. The ink only adheres to the rough, semi-transparent side.
Print it out! Voila! you have a copy of the medal suitable to use in your projector.
Step 2: Get the Picture on the Plexiglas
The plexiglas should already be cut to the right size. You will find that the plexiglas has a thin protective sheet of cellophane on each side. This must be removed from the sheet before you continue, at LEAST from the side you will draw on.
Place it against a blank wall, painted white or a light color. Try to get it as upright as possible (to avoid 'keystoning' of your image (narrower at the top than at the bottom)).
Set the overhead projector on the floor, and turn it on. Put the Transparency on the projector and focus it carefully. The image should be REVERSE-IMAGE!This is VERY important, as you will paint the reverse image side which will be protected in the box.
Make sure the Medal on the plexiglas is sufficiently large, but leave at least an inch on each side.
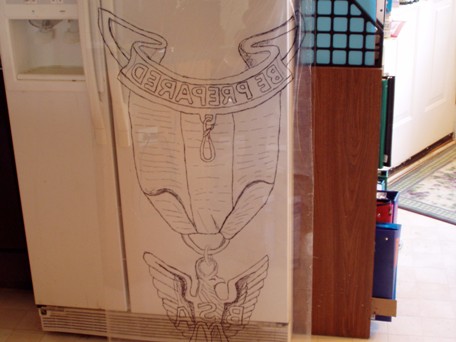
Take your sharpie and mark the plexiglas where the lines appear. If you are having trouble with the plexiglas being too far from the wall you can try taping butcher paper to the backside of the plexiglas to get the marks to show up where you need to draw the lines. You may have to turn the projector off several times to verify which lines are drawn and which are not. When you are done you should have a complete reverse-image of the Eagle Medal on the plexiglas.
The Image below should show what this looks like. The cellophane cover was left on the opposite side of the plexiglas to protect that surface from scratches etc. until we were done.
Step 3: Paint the Medal on the Plexiglas
This step seems like it should be fairly obvious what you need to do. However, I have some IMPORTANT pointers for you:
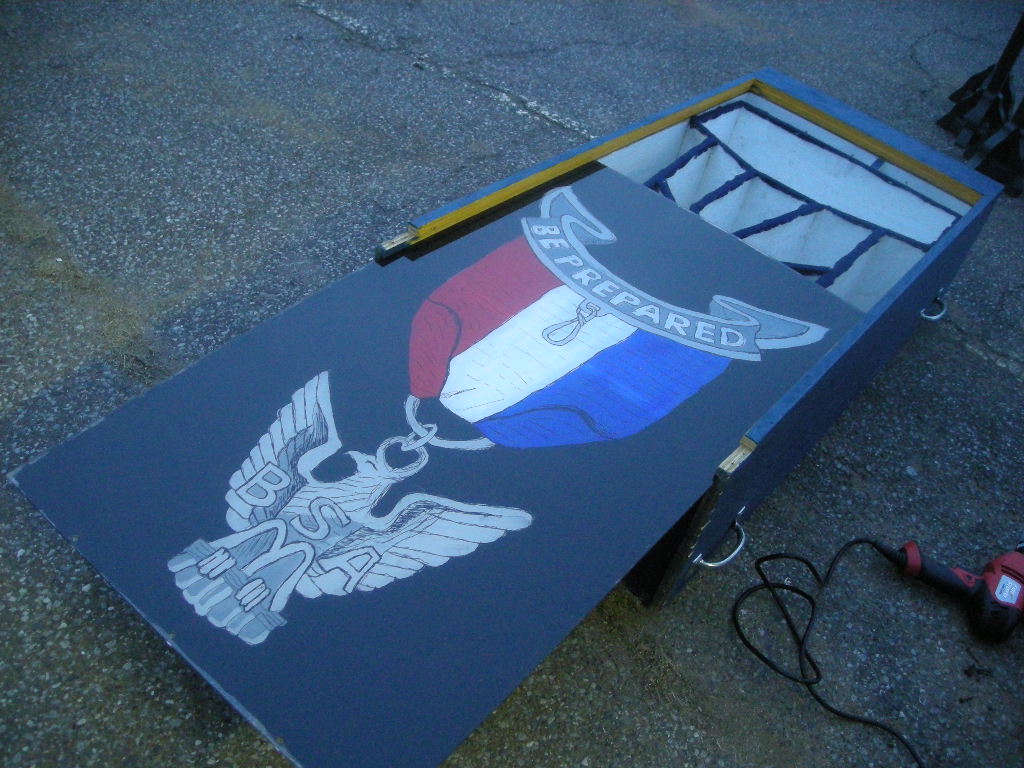
Make SURE you remember you are painting a REVERSE IMAGE (blue must go on the LEFT when you are painting it, as shown in the picture below.
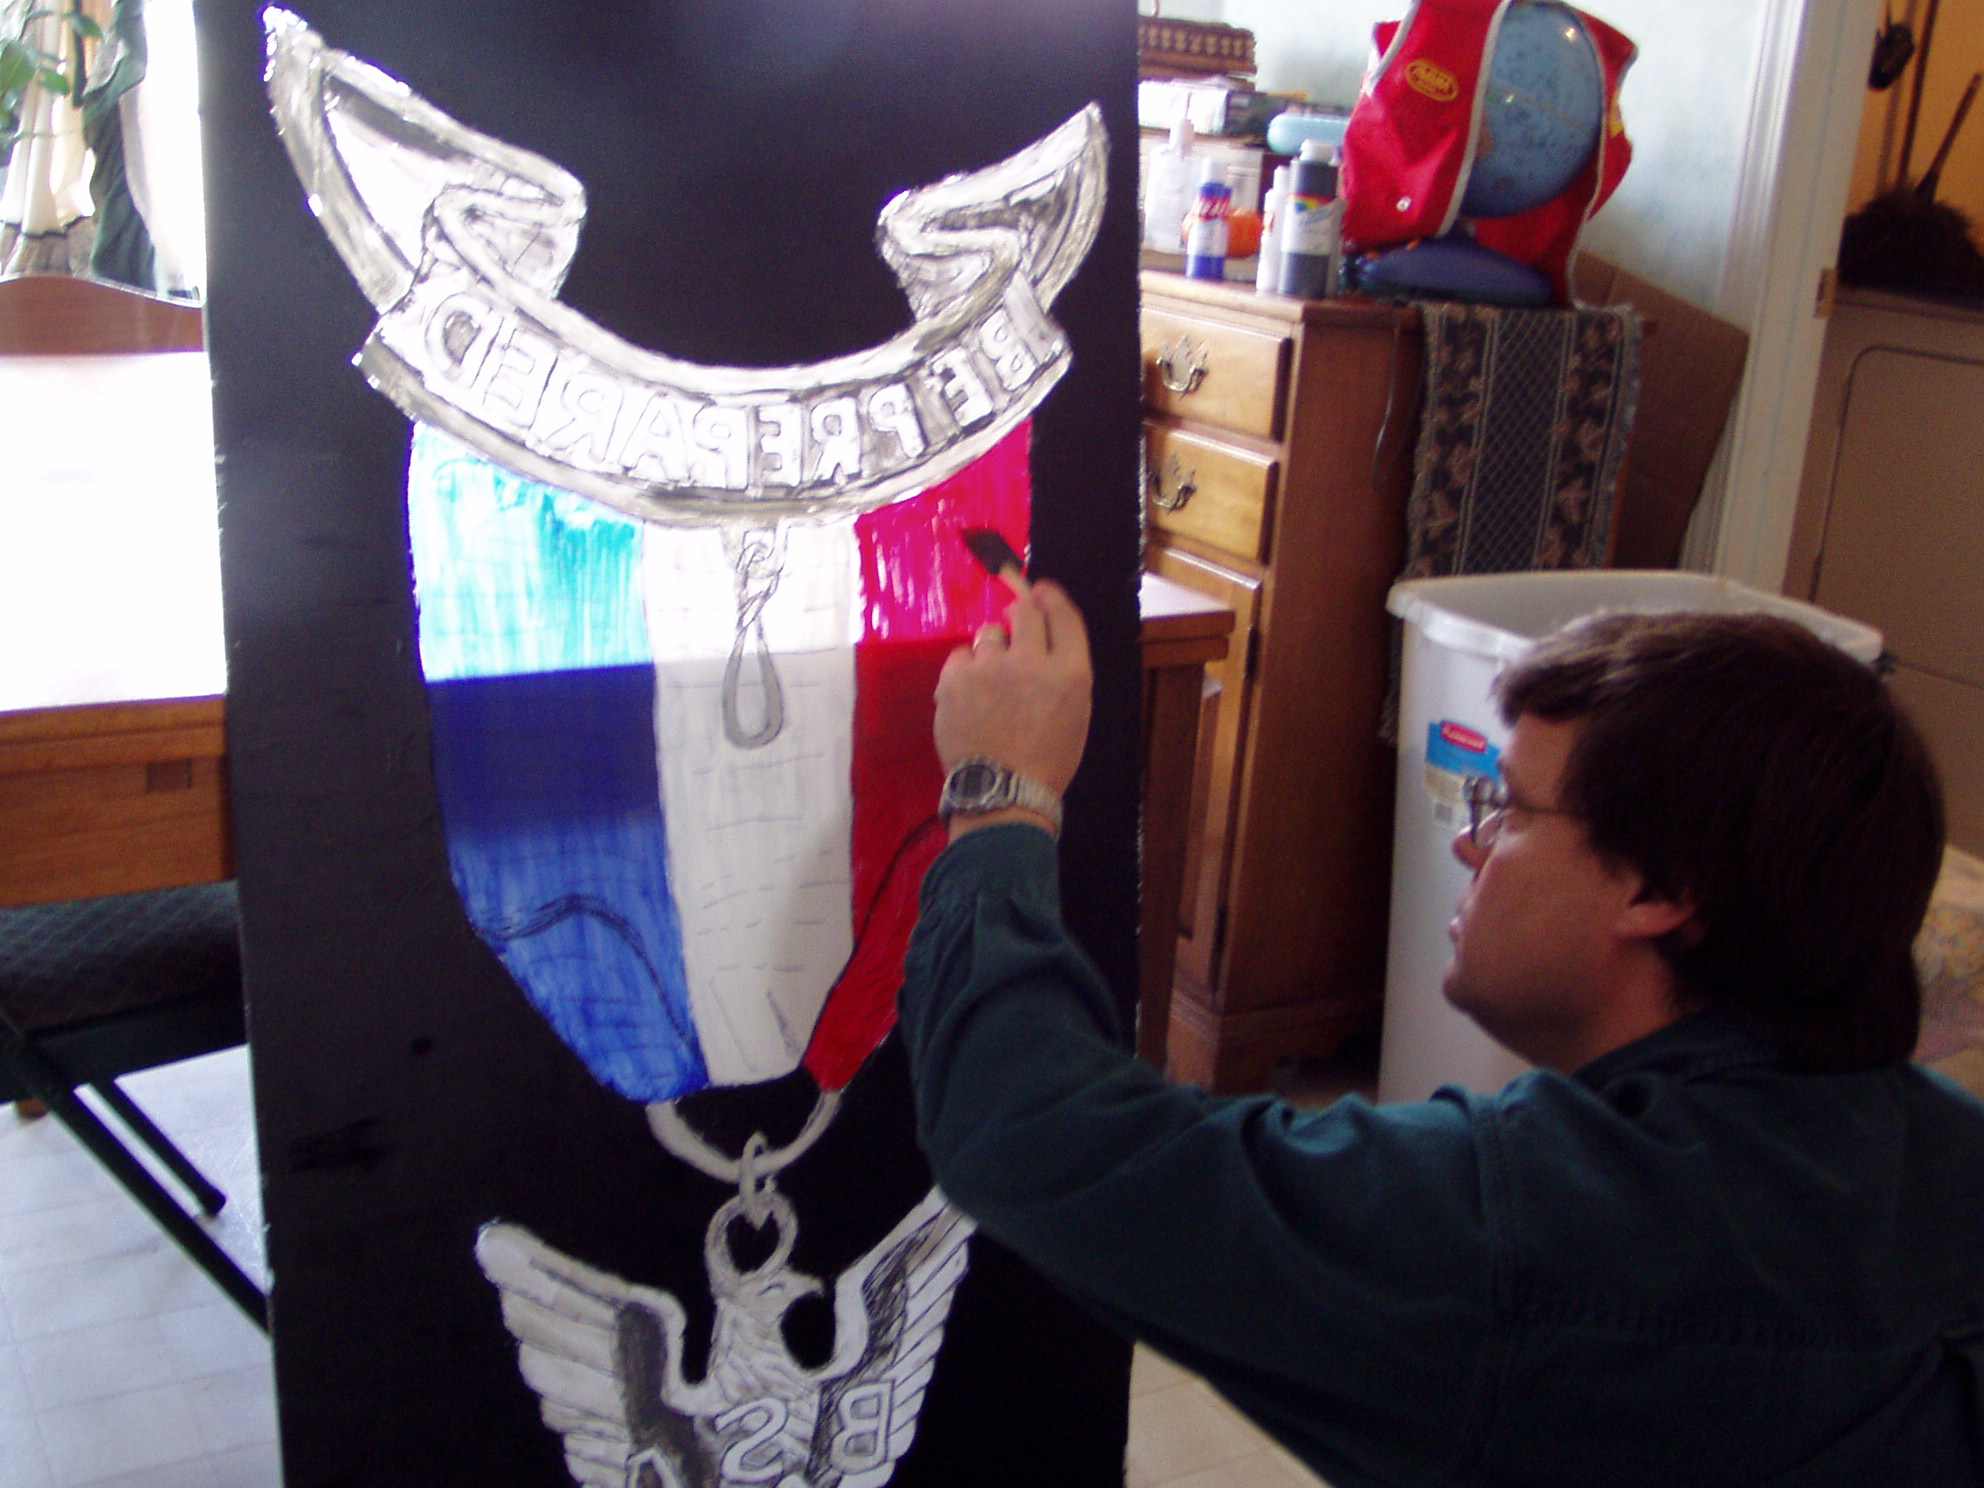
Also, make sure you paint smoothly and THINLY, so that light will pass through the colored parts. The BLACK should NOT allow ANY light to pass through it. The Gray, Blue, Red, and White should all be smoothly transparent. Try to do a better job than I did in the picture below:

Notice, on the SCROLL, the rim is painted white, as are the letters for BE PREPARED, but the back is dark gray.
Notice, on the EAGLE, that the Eagle's Wings are white or light gray, while the body is darker gray.
As you can see in the picture, I painted it while it was upright, to allow me to see if light was passing through. You want ENOUGH light to pass through that it will be easily viewable in a lighted room with a 75Watt bulb behind it, but Opaque enough that the light is spread evenly throughout and doesn't look centered around the bulb.
Step 4: Build the box
I was NOT involved in this step but I know how it's done, so I'm giving you instructions from head-knowledge, and photographs and measurements I've taken.
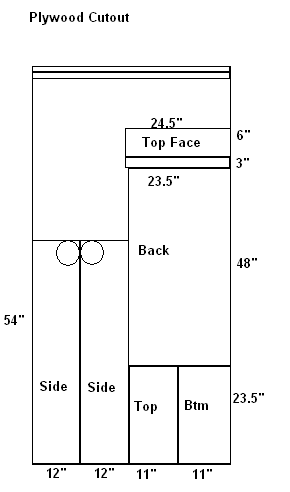
Your 3/4" sheet of plywood needs to be cut into the following shapes:
| 3/4" Plywood pieces |
|---|
| 12"x54" side |
| 12"x54" side |
| 4'x23.5" back |
| 10.25"x23.5" bottom |
| 12"x23.5" top |
| 5"x25" Top faceplate |
| 3"x25" side |
| 1"x45" side trim |
| 1"x45" side trim |
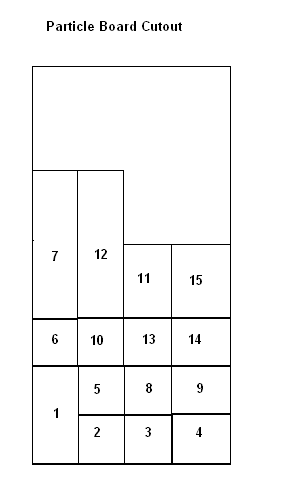
Your 3/4" sheet of PARTICLE BOARD needs to be cut into the following shapes:
| Nbr | 3/4" Particle Board pieces |
|---|---|
| 1 | 10.25"x23.5" plate above scroll |
| 2 | 10.25"x12" side of scroll |
| 3 | 10.25"x12" side of scroll |
| 4 | 10.25"x12" left bottom of scroll |
| 5 | 10.25"x12" right bottom of scroll |
| 6 | 10.25"x10" center bottom of scroll |
| 7 | 10.25"x3' left side of ribbon |
| 8 | 10.25"x12" right side of red ribbon |
| 9 | 10.25"x12" bottom of red ribbon |
| 10 | 10.25"x12" bottom of white ribbon |
| 11 | 10.25"x18" right side of white ribbon |
| 12 | 10.25"x3' right side of ribbon |
| 13 | 10.25"x12" bottom of blue ribbon |
| 14 | 10.25"x12" left bottom of Eagle |
| 15 | 10.25"x18" right bottom of Eagle |
Step 4(a):Cut the wood out.
Cut the wood pieces out, being sure to label them with a pencil unobtrusively. The circles drawn on the side pieces are 6" diameter circles positioned to connect with the top and side of the side piece - with a handheld Jigsaw, these should be cut across JUST the arc from top to back.
Set the two switch box Faceplates side by side on the TOP board where you want them, and draw a rectangle around them.
Screw the switches into the switchboxes, screw the faceplates to the switches, and place on the top where the rectangles are drawn.
DRAW the perimeters of the two switchboxes on the TOP and cut them out using drill and handheld jigsaw.
Sand every side reasonably smooth with a belt sander and 100-150 grit.
Screw the switchboxes into the TOP board with drywall screws. Remove the switches and faceplates.
Step 4(b):Rout a groove into the sides and top.
Clamp each piece to a firm surface like a table.
Set your hand router to a depth of a LITTLE deeper than 1/4", say 5/16", (to allow for a little play room...)
Set the guide to a width of 3/4", so that the router blade will eat a trench 1/4" deep, 3/4" away from the FRONT edge of the board.
Carefully rout the trench into the sides and top of the work.
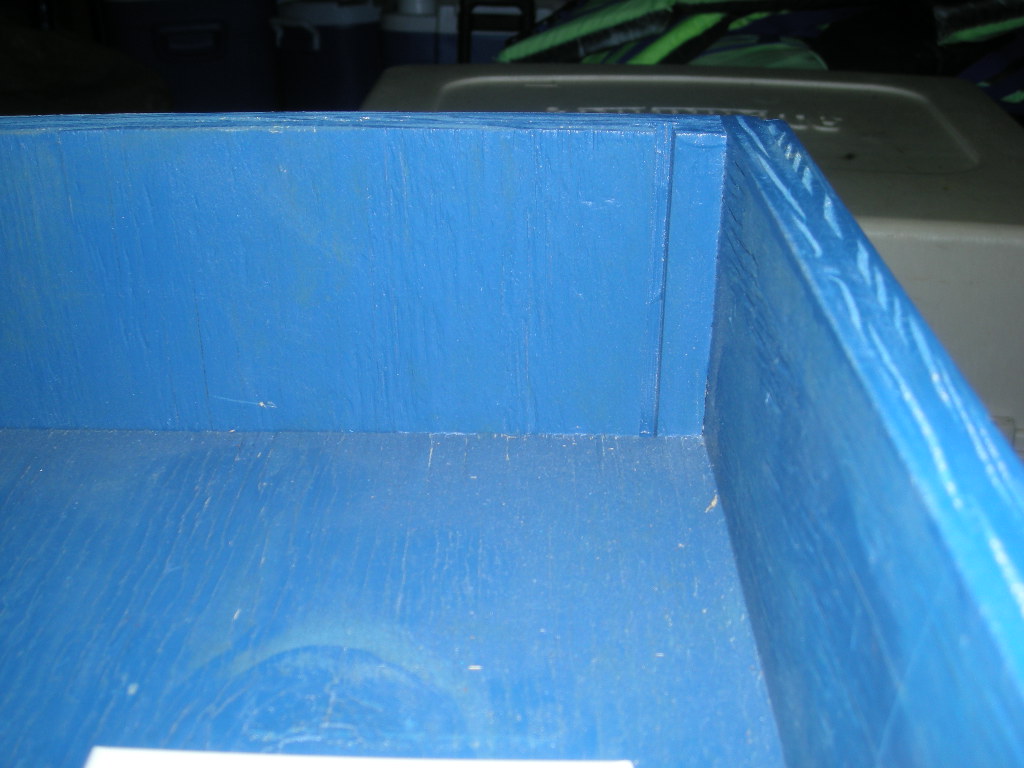
Step 4(c):Assemble sides to top, back, and bottom using 1.5" drywall screws.
Be sure to use your square to get them lined up correctly. Sides should overlap top and bottom (Top and bottom boards should stretch between sides, TOP of top board should be 3.25" from top of sides, TOP of bottom board should be 3" from bottom. The BACK board should be UNDER the BOTTOM board, but should TOE against the TOP board. Screw holes should be Pre-drilled using a 1/8" bit from the SIDES into the TOP and BOTTOM boards, and into the BACK board along the 'back' of the sides. Best to place the Plexiglas in the groove PAINTED SIDE UP!!! before screwing the sides together with the top and bottom, to ensure the plexiglas can slide easily in and out through the groove, as shown in the picture below:
The groove for sides and top should mate together. This is the groove your plexiglas will slide into. Plexiglas should slide OVER the bottom. (Bottom board should not obstruct the groove, or in fact touch the plexiglas (to prevent it scraping the paint off when you need to slide the plexiglas off to change bulbs etc.).)
The Plexiglas is exactly 4' (48") long. It should slide into the groove in the top board and JUST cover the bottom board. This means that the TOP of the top board should be exactly 3.25" from the end of the sides, and the TOP of the bottom board should be EXACTLY 3" from the bottom.
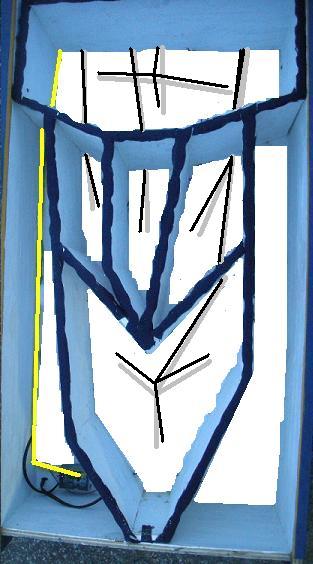
Step 4(d):Dividers.
Drill 1/8" holes in the divider boards close to the 'back' side, for the wires to run through. On the board to go on the TOP of the scroll (#1) drill a 1/2" hole for the Romex to snake through. This should be on the LEFT side. Do the same for the 12" board for the LEFT BOTTOM of the Scroll (#4). Using 2 bricks, position each divider so it separates the light areas(Red from White from Blue from Scroll from Eagle.) Use the flashlight to light the area, and lay the plexiglas on top of the box in position, to get a good idea of the area dividers. A BETTER idea would be to lay butcher paper on the plexiglas, draw the medal rough-out on it, lay the butcher paper in the box, and score the box bottom where the dividers should go.
You should get one of the light fixtures and ensure there is at LEAST enough room between dividers for the placement of a full-sized light socket. Otherwise you will have to cut a light socket to fit, which is a fire hazard (see below:)
(Don't worry, if you have painted the BLACK thickly enough, having the dividers wider than the ribbon will not affect the look and performance of the box.)
Use a pencil to mark on the bottom where the divider boards go. Make SURE there are wire holes drilled where they NEED to be, then drill guide holes for stabilizing screws DOWN through the back. Using the bricks, hold the board exactly where you want it (with holes toward the BACK) and drive 1.5" drywall screws into the divider boards. You'll need to hold the board with one hand.
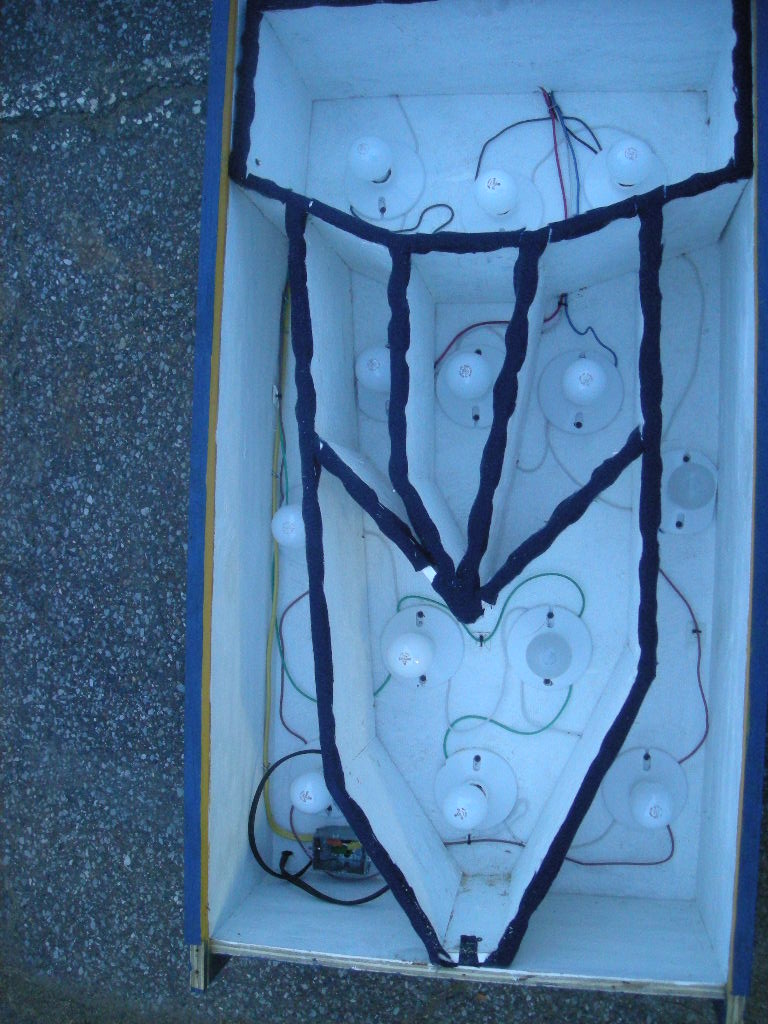
When you are done, your box should have all dividers necessary to isolate the light.
Step 4(e):Paint interior.
Spraypaint the interior of the box white, on all faces, to ensure that the light will be reflected out.
Step 4(f):Run wire.
Drill a 1/2" hole in the bottom back of the box, left corner as you 'face' the box, as shown below. affix the junction box to the back wall using 3/4" screws. Knock out a knockout slug, and run the 15' power cord up through the hole in the back. Thread it through the knockout hole, and use a knockout plug crimp to secure 6" of the wire into the breakout box.
Cut an 8' length of Romex 14-guage wire, and run it up the left side of the box, securing with a staplegun every 6". Leave 18" at the bottom and the 3 wires into the 3 wires coming in from the power cord. Make sure the staples do not hit wire.
Cut the outside shielding from the last 2' of wire.
Connect the white (common) and bare (ground) to all 5 switch boxes using short daisy-chaining wires where needed. Connect the black wire to go THROUGH each switch, daisy chaining the 'hot' side to the lower side of each switch.
Run white wire from each junction to the 5 light group areas (RED, WHITE, BLUE, SCROLL, EAGLE). For MOST speeches, this is the order used, so you may want to wire the switches LEFT to RIGHT (operator perspective) with this in mind.
For the SCROLL and EAGLE area, you will want to run 3 white wires 6"-12" to reach the 3 light sockets. Join securely with a wire nut.

Run the Black wire from the TOP of each switch (on the SWITCHED leg) to it's corresponding area, keeping in mind the switch order.
For the SCROLL and EAGLE area, you will want to run 3 black wires 6"-12" to reach the 3 light sockets. Join securely with a wire nut.
Step 4(g):connect lights and switches.
Set light sockets in place, wire them to wires, and connect sockets and switches.
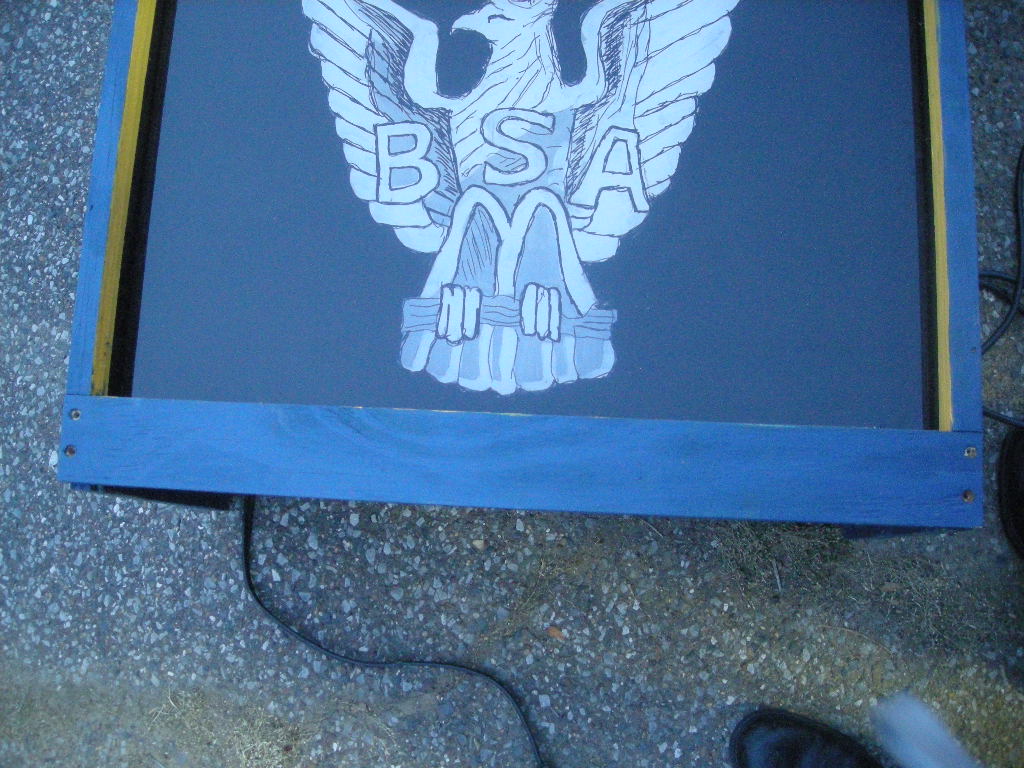
Step 4(h):Paint Outside.
Attach the Top Faceplate, the two 1" sidebars (flush with outside of box). Attach the Top faceplate with countersunk 1.5" drywall screws, attach the 1" boards with gorilla glue. The 3" BOTTOM Faceplate should just fit in the remaining 3"
Paint the sides, back, top, and face blue. Paint the inside facing yellow/gold.
Step 4(i):Staple felt cushion on the tops of all dividers.
Stretch the 2" wide strip on either side of the dividers, and attach firmly by staplegun to the sides of the divider tops.
Use gorilla glue to anchor where staples cannot reach.
Step 4(j):Test and assemble.
Connect 9 flourescent light bulbs 75Watt (uses 30watts?) to the sockets and test the box.
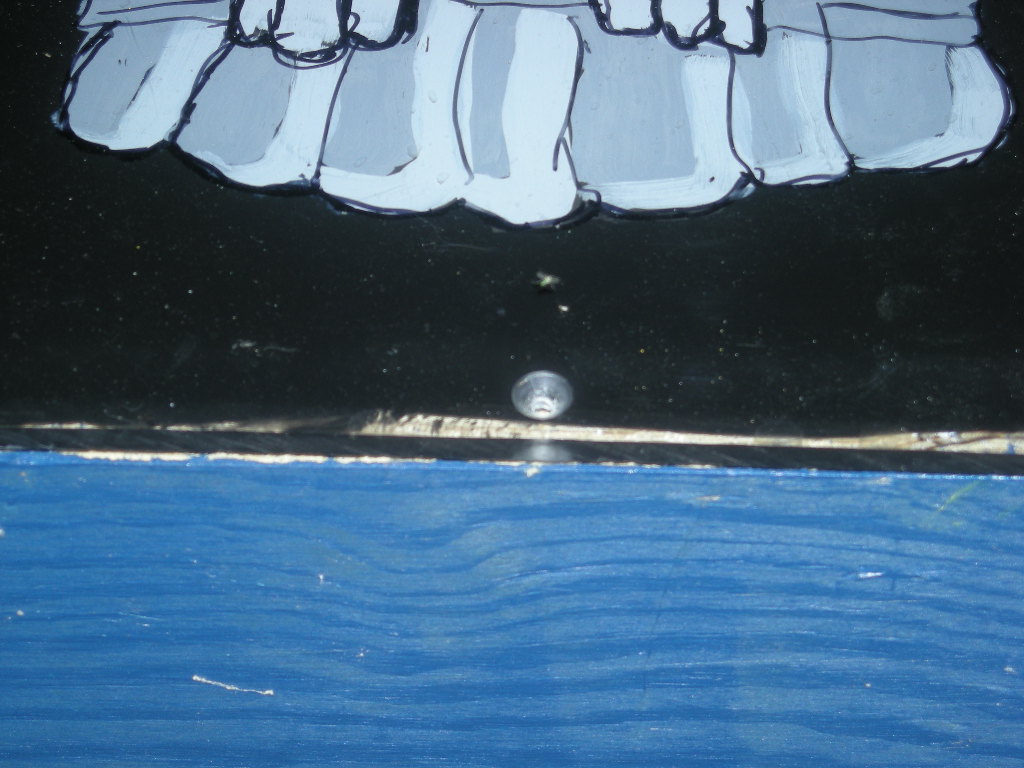
Insert Plexiglas into groove and ensure it seats firmly in place with the BOTTOM of the plexiglas flush with the BOTTOM of the BOTTOM board.
Predrill 3 1/8" holes to secure the Plexiglas in place. Use a countersink drill bit to set the drill holes to countersink flush against the Plexiglas face. Secure the plexiglas with 3 1.5" drywall screws.
Secure the BOTTOM faceplate in place with 4 countersunk 1.5" drywall screws.
YOUR BOX IS READY!!